Vectric PhotoVcarve is a great piece of software to turns your photographs into great CNC projects.
There are many different styles  that can be used within this software package.
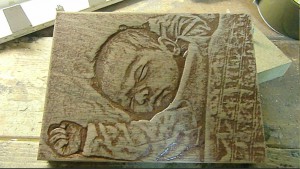
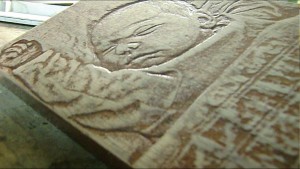
This time i will show how you can turn a photograph into a wooden relief.

The first thing we need is a photograph, in this case its the pride of Dennis and Kika… Named Emilia…
(Isn’t she sweet… 🙂 )
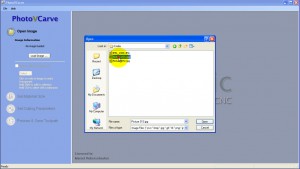
Most industry standard pixel based image file formats can be opened and used with PhotoVcarve.
(JPG, BMP, TIF, GIF, PNG)

Emilia_01

Lets start of by loading the image into PhotoVcarve….
After loading the image you can decide to limit the toolpath to only cut inside specific regions.
This is done by interactively selecting colour’s in the image to be Transparent.
This can be very useful for removing unwanted background detail from a photograph.
More on this option in my next tutorial when i actually will use a V-Carve instead of a relief.

02_PhotoVcarve

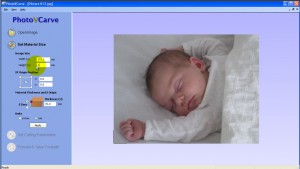
In the section ‘Set Material Size’ we can set all material settings.
Check the radio button to select Inches or Metric units.
Now you can set any x or y size where x will be the horizontal size, en y the vertical size.
You will only need to fill in one of them as the aspect ratio of the original file will be retained.
The Thickness Z holds the value of you material thickness

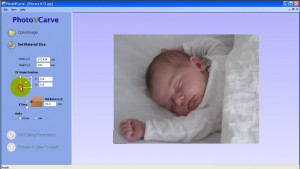
Now we have to decide where our carve Zero must be located.
First of all we want the Z=0 on top of the material, and from the we carve down in Z=negative direction.
To do this we select the top radio-button of Z zero.

With the radio-button square we can select corners, or center for the X and Y Zero.
But you can also use the text boxes to give the exact offset.
This can be very interesting if you use this carve inside a bigger project.
For now we click on the left bottom corner for easy of positioning the workpiece later-on.
So where is X=0, Y=0, Z=0 ? Yep… in the bottom left corner ‘on top’ of the material block (remember that one).

Click Apply and where of to section 3….

04_PhotoVcarve 03_PhotoVcarve

Section 3 is named ‘Set Cutting Parameters’ And this is the most important part.
First we have to know what type/style we want to achieve, in this case i want a relief of 2,5mm depth.
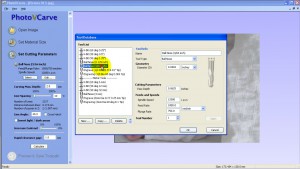
For a relief file i would want to use a ball-nose cutter, this will give the best and smooth relief result.
The smaller ball-nose you choose the finer the result, but machine time will take more also.

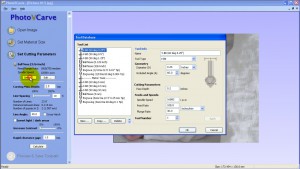
For this picture (170x130mm) i will use a 3/64″ ballnose, this will give a very fine result.
I’m only carving 2,5mm depth, so i will not use more then one tool (More on this when we do Lithophanes)

Within the tool selection screen you can change any feed to your needs, these where good for my machine.
You can also make new, or copy and change tools here…

Mean thing here : For a relief Photograph its best to choose a ‘small ball-nose’.

05_PhotoVcarve 06_PhotoVcarve

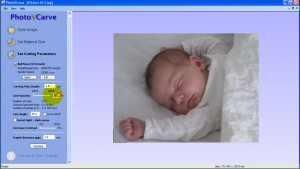
Oke we want a relief result of 2,5mm depth.
This means that the difference between the lightest part and the darkest part on the image will be 2,5mm depth.
So at first we set the ‘carving max depth’ setting on 2,5mm.

Now the line spacing, the slider tell’s you you can set anything between 100% and 200%…
But the text box on the side can be set to 10% if we want….  And yes we want that….
The ball-nose will carve this relief by carving a lot of lines.
The 10% means that the space between these lines will be 10% of the 3/64″ cutter.
10% or less will give the best result here.

Set the line angle to 45 degree’s,
this way the ball-nose mill will start in the right bottom corner and make a 45degree raster.
(This way the tool gets least of the load, more on that later on)

The check-boxes ‘Invert dark and light’, ‘Cross Hatch’ and the contrast slider can be left alone.
(Low quality photographs can be improved by enhancing the contrast to improve the machined results. )

Rapid clearance cap is set to 1, this way the rapid feeds will be done 1mm above the surface.
This must be a hight save of fixtures etc, but keep it low to keep machine time down.

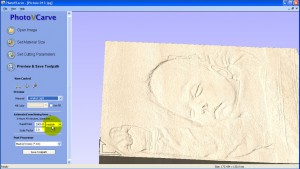
In the last section of PhotoVcarve we can preview the result. (
If you sell these products you can change material settings, color, rotate and zoom to make nice screenshots.

Set the rapid rate to something you desire, in my case its set to 2000mm/min.
This way you can make a estimated machine time, to decide the actual cost for your customer.
My machine rapids at speeds over 2000 but with with the rapid set to 2000 and the scale factor to 1
Vectric  calculates a machine time of 1 hour and 53 minutes.
This project took me 1 Hour and 59 minutes with tool changes so these settings are great for my machine.
So the first time you will have to compare this, and in the future projects you will know the best settings

Select the post-processor you need, in my case the one for Mach3 and save the toolpath.

07_PhotoVcarve 08_PhotoVcarve

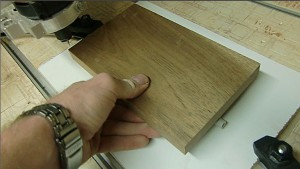
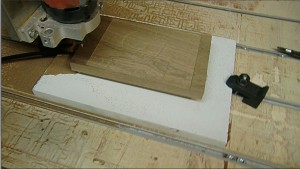
Load the G-code into Mach3, place the ball-nose on the bottom left corner and zero your DRO’s.
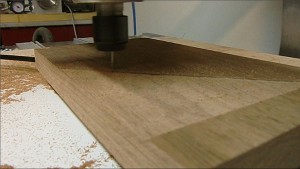
And start milling…… This will take some time… 2 Hours as calculated before…

09_carving 10_carving

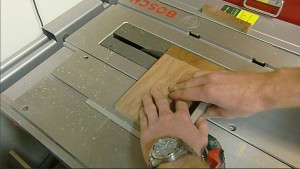
After the carving is done, you could use Vectric’s Cut2D to make a nice cut-out…
To bad Vectric did not sponsor me a version of Cut-2d (TIP) haha, so i will use the table saw…

11_carving 12_cutout

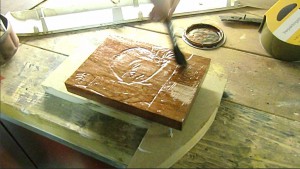
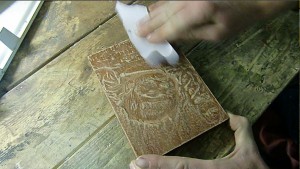
Using Wood-stain my girl (who does all the RoboCNC paint work..) paints the relief.
You can see that Emilia already appears in the wood…
After a good night sleep its time to take some 150 grid sand paper, and make the ‘effect’.
Vectric PhotoVcarve makes the dark area’s deep, and light area’s less deep.
When using sandpaper we bring back this contrast effect, and the real Photograph appears…

13_woodstain 14_sandpaper

Taadaaa…..

15_result 16_result

90 Comments

  1. marcoooo1000 Says Beantwoorden

    [..YouTube..] nice one :)what type off wood is that ??

  2. Marcelmx3 Says Beantwoorden

    [..YouTube..] @marcoooo1000 Thanks Marco.. The wood type is Mahogany, a hardwood that i often use for ship name signs.Will turn a bit grey if left ‘as is’, and this time i used wood stain to bring out the relief more.

  3. Michael Says Beantwoorden

    Zooo mooi man…
    Echt heel mooi werk wat je doet!!!
    heb je bouwprocess gevolgt op cnczone !
    mag ik vragen welke combi je gebruikt van driver en stepper?
    Enne mag ik jou machine nabouwen??? (maar dan iets kleiner freeesbereik 600x600x150)…

    • Robo Says Beantwoorden

      Hai Micheal,

      Bedankt voor de complimenten,
      Voor meer info over steppers/drivers lees even rustig verder op de site, alles staat er op.
      mocht je vragen hebben gebruik aub dan even de juiste plaatsen, dus stepper vragen binnen de electronics en niet bij de PhotoVcarve tutorial..

      Nabouwen, natuurlijk mag dat…

  4. marco Says Beantwoorden

    Verry nice and a handy guide how to do it :). Now I have to buy photocarve 🙂

    • Robo Says Beantwoorden

      Thanks Marco,

      Yes Vectric’s PhotoVcarve is a very nice tool for these kinds of jobs.
      Its inexpensive compared to comparators…

      It can do much more, as i will show in future tutorials…. upcoming will be :
      – Photographs using a V-carve line pattern.
      – Lithophanes in Corian
      – Lithophanes on a 4th axis around a pvc pipe
      – Greyscale image 3d carving

      So keep posted…., and buy yourself a copy, (they have a trail version to)

      Ps. i do not have any commercial profit from Vectric, just like there software a lot…

    • marco Says Beantwoorden

      That is a nice software I alrady know.. But first I have to finish mine new machine so I stick with artcam for now …

  5. Guy Says Beantwoorden

    Great tutorial, whats the price of this software?

  6. John Says Beantwoorden

    The final sanding can be problematic if it cuts down too deep. Might I suggest you try the following method?
    1. Do your engraving and finish it with fine sandpaper as needed.
    2. Place you finished piece face down onto a piece of cloth that has been soaked with sanding sealer. This will “stamp” the front surface with sealant.
    3. Turn it over and let it dry.
    4. Next you can apply a darker stain and it will only soak into the deeper areas that did not touch the cloth.

    This should bring out the depth of the image and it still lets you apply a final sealant without disturbing the new higher contrast ratio. Note: I have never tried this method, but it seems to make sense. Please let me know if you try it and it works.

    • Robo Says Beantwoorden

      Hi John,

      Thanks for your reply. and your thoughts… Its always great to share ideas, tips and tricks..
      Indeed sanding will take away a small amount of detail, although this method has worked for me fine till now.
      The effect is not a HD Photograph, it will always loose some detail compared to the picture it self.

      All this said, i think your method could indeed be true and so i will try it for sure…
      And of course when i did try i will show the result on this website.. (Subscribed?)

      If some visitors did try this in the mean while let us know…

      Thanks for the advise John !

  7. jdsprince Says Beantwoorden

    [..YouTube..] Nice work Marcel! I recently purchased Vectric VCarve Pro & PhotoVcarve and they are amazing programs! I hope to buy? Aspire soon. Happy Holidays my friend. -Hank

  8. Marcelmx3 Says Beantwoorden

    [..YouTube..] Indeed great software…, Although for Aspire i hope there will be some special discounts one day… :)Stay tuned, because i am planning to do some strange tutorials with PhotoVcarve? soon…First a normal Litho, but i have some nice ideas…

  9. mollmae Says Beantwoorden

    [..YouTube..] @Marcelmx3 I am thinking of purchasing the photo vcarve.. I noticed the time was shown as 1:59.25 on the mach 3 software..Hoe long would it take me to mill something like that if the cnc router was good quality and I had the same software..old scholl retiree and just need? to get my moneys worth on such a large invetstment…klingenbergjim@yahoo.com if you can respond, i appreciate it

  10. Marcelmx3 Says Beantwoorden

    [..YouTube..] @mollmae Hi there….Yesterday i made some video material? for the next PhotoVcarve tutorial…On there i will show how to calculate the machine time for a project.Its not possible for me to answer the question as i do not know your machines speeds, settings, and project.Stay tuned for more info….

  11. Marcelmx3 Says Beantwoorden

    [..YouTube..] @pinhocareca Thanks !?

  12. karandex Says Beantwoorden

    [..YouTube..] so you have a business setup, you got a lot of tools?

  13. Marcelmx3 Says Beantwoorden

    [..YouTube..] @karandex? No business, just hobby 🙂 although i do spend a lot of money on tools 🙂

  14. karandex Says Beantwoorden

    [..YouTube..] what is? spindle speed

  15. karandex Says Beantwoorden

    [..YouTube..] what is spindle speed? what kind? of resolution is needed for this kind of job

  16. Marcelmx3 Says Beantwoorden

    [..YouTube..] @karandex The spindle speed is not something to worry about all that much vor wood.But the kress? set to 3 or 4 is used in this project…

  17. Marcelmx3 Says Beantwoorden

    [..YouTube..] @karandex Resolution for this? is also not really something to worry about for small engravings.Pixels are much smaller then the endmill, and therefor even pictures with low res will work…

  18. rodicaxplod Says Beantwoorden

    [..YouTube..] foarte tare!!!felicitari si? pt lucrare si pentru masina!

  19. h0pl1t Says Beantwoorden

    [..YouTube..] plz, can you tell? me what kind of machine you are using where is mach3.

  20. Marcelmx3 Says Beantwoorden

    [..YouTube..] @h0pl1t Checkout my website? and see its a DIY machine

  21. h0pl1t Says Beantwoorden

    [..YouTube..] @Marcelmx3 one? more question, on what wood do you working?

  22. Marcelmx3 Says Beantwoorden

    [..YouTube..] @h0pl1t Mahogany?

  23. kroko13a Says Beantwoorden

    [..YouTube..] I’ll try something like this myself.?

  24. Marcelmx3 Says Beantwoorden

    [..YouTube..] @kroko13a Good luck my? friend…. Show your work when your done….

  25. Suade907 Says Beantwoorden

    [..YouTube..] Any chance you can explain how your vacuum block works. I’m getting my cnc router in about a month. I’m very new to this and vacuum tables and such. I liked your little device. What is the junction on the side where you turned on the air. Are you using a air compressor or? a vacuum device? Thanks

  26. Marcelmx3 Says Beantwoorden

    [..YouTube..] @Suade907 Checkout my website….?

  27. winkle51 Says Beantwoorden

    [..YouTube..] i didnt even know this can be done fantastic? mate love it

  28. RoboCNCnl Says Beantwoorden

    [..YouTube..] @winkle51 Thank you Winkle….There is so much that can be done ;)Keep track of all these project by subscribing to my new channel, (this channel will be inactive)?

  29. slverarowana1 Says Beantwoorden

    [..YouTube..] nice work… i like your videos. Is your CNC router homemade? I? do some woodworking and was thinking about buying a Shopbot. What do you think?..

  30. RoboCNCnl Says Beantwoorden

    [..YouTube..] @slverarowana1 Hi there…This is my old YouTube Channel, please visit my new one to see the videos of the Router build (indeed home made)?

  31. Gareth52 Says Beantwoorden

    Hi Marcel,
    Could you tell me what exactly you (or your girl) paint on the fiished carving? Is it stain, or varnish/shelac? I have done a few of these now, but cannot get the results that you do. They are good, but not good enough.

    Cheers,
    Gareth

    • Robo Says Beantwoorden

      You are right that those hands do not belong to me 🙂 indeed my girl does paintwork and airbrush.. (to come).
      The finish used is stain indeed… Or ‘beits’ as they call it over here (google for comparison).
      While your at it do a search for ‘glazing’…. that is something i have not tried but seems to be even more beautiful for these projects.

      Ps, post a link to your work next time 😉

      • Wolffie Says Beantwoorden

        Love the work but…….. it freightened the living daylight out of me to see you use a tablesaw without a blade guard and a fence.
        Cheers
        Wolffie

        • Robo Says Beantwoorden

          Hai Wolffie…

          Thanks for your compliment, and concern.. 🙂
          I do not own the tablesaw anymore, so for now i can say ‘Sorry.. i will not do that anymore’

  32. Gareth52 Says Beantwoorden

    Beits seems to cover many different finishes. I just noticed that your stain seems to have more gloss shine to it as it is being applied than mine. Maybe it is just the lighting. I looked at that glazing. It appears to give very nice results, but also a lot of work to get a good finish. (Your girl will be busy).
    I can’t post my work, as I don’t have a web site any more/

  33. Srinivas Says Beantwoorden

    Sir
    We need photoVcarve software How can I get, How much I have to pay in which way I have to pay
    please send details
    with regards
    srinivas

  34. Mariosam2v2 Says Beantwoorden

    [..YouTube..] `great work

  35. Mariosam2v2 Says Beantwoorden

    `great work

  36. RoboCNC Frees- & Graveerwerk Says Beantwoorden

    @Mariosam2v2 Thanks….

  37. RoboCNC Frees- & Graveerwerk Says Beantwoorden

    @Mariosam2v2 Thanks….

  38. RoboCNC Frees- & Graveerwerk Says Beantwoorden

    @Mariosam2v2 Thanks….

  39. 4hdaniel Says Beantwoorden

    [..YouTube..] hi! What do you use for producing vacuum? Do I see right 0.2bars? Looks professional and fast!

  40. RoboCNCnl Says Beantwoorden

    [..YouTube..] Daniel please take a look at my other videos, or search vacuum on my website.

  41. RoboCNC Frees- & Graveerwerk Says Beantwoorden

    Thanks Pablo ! Nice to hear it worked out for you to.. !

  42. RoboCNC Frees- & Graveerwerk Says Beantwoorden

    Thanks Pablo ! Nice to hear it worked out for you to.. !

  43. RoboCNC Frees- & Graveerwerk Says Beantwoorden

    Thanks Pablo ! Nice to hear it worked out for you to.. !

  44. RoboCNC Frees- & Graveerwerk Says Beantwoorden

    Hvala!

  45. RoboCNC Frees- & Graveerwerk Says Beantwoorden

    Hvala!

  46. RoboCNC Frees- & Graveerwerk Says Beantwoorden

    Hvala!

  47. Anant Sharma Says Beantwoorden

    I want to know that : which type of wood I use to get the best result and in the above example which wood has been used

  48. RoboCNC Frees- & Graveerwerk Says Beantwoorden

    Thank you Ro0220 !

  49. RoboCNC Frees- & Graveerwerk Says Beantwoorden

    Thank you Ro0220 !

  50. RoboCNC Frees- & Graveerwerk Says Beantwoorden

    Thank you Ro0220 !

  51. Pepa Sysel Says Beantwoorden

    to bych cht?l d?lat

  52. blocke Says Beantwoorden

    You mentioned “tool” change. Did you use other bits beside the ball nose? Got a new granddaughter about a month ago. Can’t wait to try this.

    • Robo Says Beantwoorden

      For this picture (170x130mm) i have used a 3/64? ballnose, this gives a very fine result.
      I’m only carving 2,5mm depth, so i did not use more then one tool
      If you have to carve deeper, of in harder materials you could do a roughing pass.

      Good luck, and congratulations 😉

  53. RoboCNC Frees- & Graveerwerk Says Beantwoorden

    Im not selling this..

  54. RoboCNC Frees- & Graveerwerk Says Beantwoorden

    Im not selling this..

  55. RoboCNC Frees- & Graveerwerk Says Beantwoorden

    Im not selling this..

  56. bosnikchu Says Beantwoorden

    +RoboCNC Frees- & Graveerwerk This is most original idea that I’ve seen.It is very interesting, I would like to make something like this.

  57. splufty Says Beantwoorden

    My old shop teacher would have disapproved of your saw technique. Made me nervous watching.

  58. Todd Bailey Says Beantwoorden

    Great Job Marcel!!! One of my customers pointed to this video as reference for a job he has me working on!!!! You are setting the standard my Friend! PS – Love the shop tools!!!!

  59. dragos pascal Says Beantwoorden

    Hi!Can I have a price?….dragos_pascal@yahoo.com

  60. One Toya Says Beantwoorden

    What kind of wood do you use?

  61. One Toya Says Beantwoorden

    Hello. Looks simple… but you are an artist!I would like to know the parameters you used Ball nose : 3mm? Feed / plunge rate:? (Mm / sec) Number of lines?I try to learn from you. thanks!

  62. Arjan Swets Says Beantwoorden

    is het het zelfde als een lithoplane? alleen dan zwart het diepst?

  63. Mogoseanu Nicusor Says Beantwoorden

    Awesome, i want to make that. I have Heiz High-Z S-1000, it’s possible with that machine? I’m newbie and i try to learn deskproto from tutorials and i saw ur video. And for 2nd question, all of ur tutorials can be made with that machine? Have a nice day.

  64. gerben120 Says Beantwoorden

    wat een geweldig werkje !! wat voor een lak of iets gebruikt u ? en daarna schuren met schuurpapier neem aan een hele fijne korrel? 500 ofzo?alvast bedankt !

  65. michael cochrane Says Beantwoorden

    this video highlights one of the many issues with vectric software. You can do the basic outline, even a very minor depth but to actually bring that photo into full 3D take hours and hours of editing, cutting the ‘photo’ into individual segments, changing their depth, baking them back together, blending and smoothing….Where it would be pretty easy and straight forward to “extrude” a part of the image upwards…..

  66. bradbit monleon Says Beantwoorden

    awesome so niceeeeeeeeeeeeeeeeeeeeeeeeeeeeee

  67. Tonny Milfiger Says Beantwoorden

    are there any machine like this for rubber? or stiffy foam?please help me out with this buddy thanks!

  68. CNC-STEP / CNC Router and Water Jet Cutting Machines for wood, plastic, metal and other Says Beantwoorden

    A really great result !

  69. Bahaneci banane Says Beantwoorden

    hi .. what is the latest substance placed? thanks

  70. ruben garcia Says Beantwoorden

    hola amigo me encanto…. cuanto sale una maquina asi

  71. sucksess Says Beantwoorden

    I’m going to do this in black plastic..encase my 8 yr old in ‘carbonite’ for his headboard!

  72. Cali Craft Says Beantwoorden

    gr8! thx so much ,will try it soon

  73. Michael Says Beantwoorden

    What type of stain do you use for the relief? “Using Wood-stain my girl (who does all the RoboCNC paint work..) paints the relief.”

  74. Nelu Iovita Says Beantwoorden

    Hello , can I duplicate exactly one detailed wood carved icon after his pictures, instead to use one 3d scan ?(- the carving is to be done with a cnc milling machine – router . Rezolution is 0,1 mm and advance 0,05 mm.)Best regards, Nelu

Leave a Reply