It’s time for the second axis to show some movement.
This time we will start working on the Y axis, just because the X axis is on top of Y.
Almost all info on the assembly can be seen in the YouTube movie.
So just some quick drawings of the parts should be enough for this post.
The first thing we need is the leadscrew, and for this axis I used the RM1605 (found on Ebay : Linearmotionbearings2008)
For the price its always smart to purchase some extra replacement balls and a second lock nut.
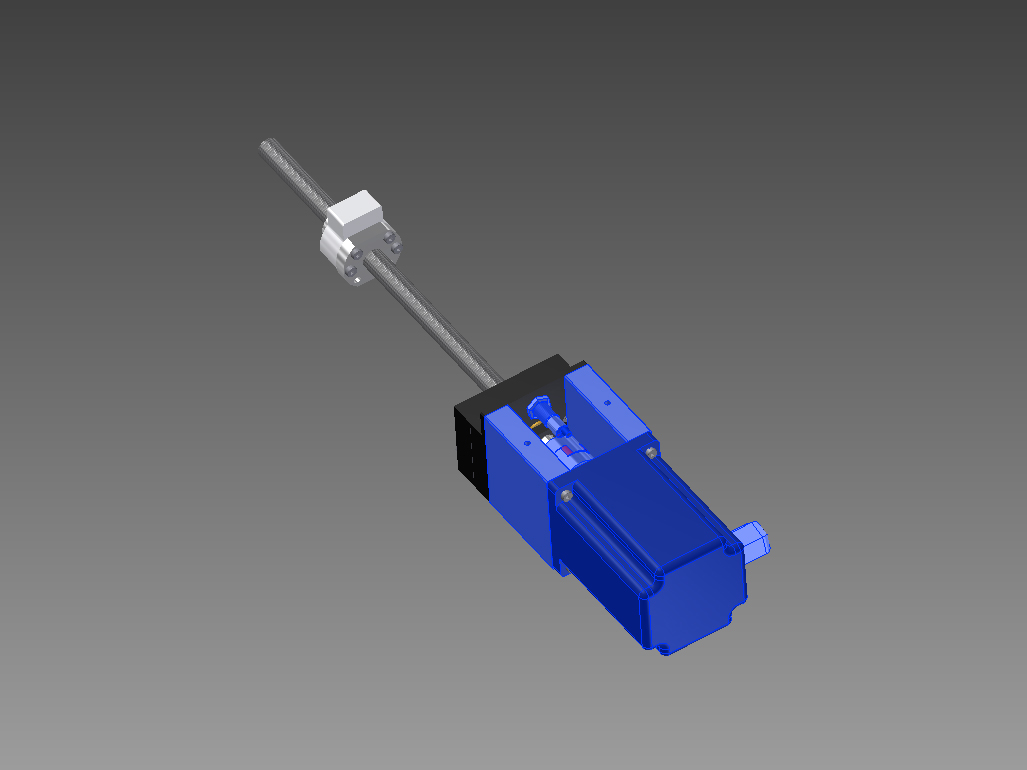
On the left we can see the drive parts for the Y-axis, where the blue parts are drawn in the right to order.


Drawing: Ballscrew_Y
The blue parts below are parts I can be bought at www.DamenCNC.com for example.
One Nema 34 4.0Nm Stepper motor: DCNC-IP54-4.0NM
One Zero Backlash Shaft Coupler DCNC-D32-L32
Two Nema 34 Stepper Mounts Nema34Mount
One 3201/5201ZZ 12x32x15.9 (Double row angular contact bearing)
One Inductive Switch Shielded 12NOC2A-S NPN
And a hand full of bolts… 😉
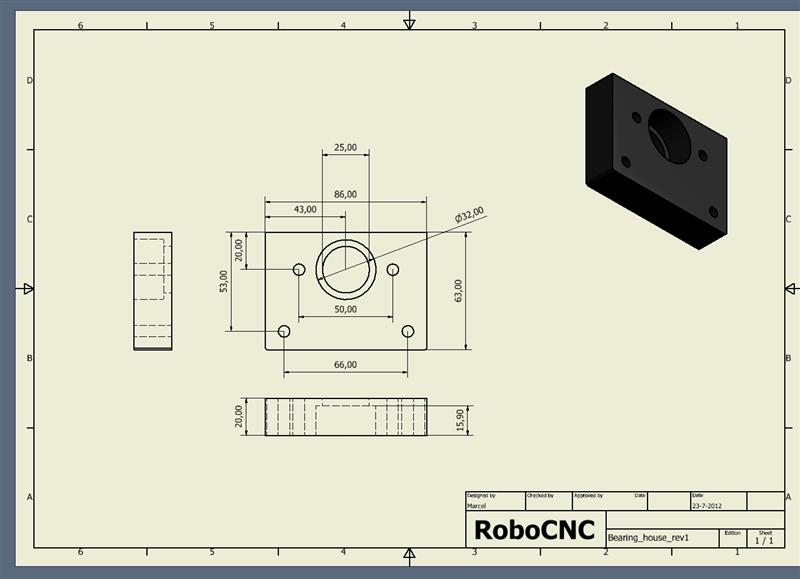
Now the last three parts that you will really have to make your self
1. The ball nut bracket that drives the saddle.
2. The housing for the angular contact bearing
3. The adapter plate that wil be used to fix the stepper mounts on (and the home sensor).


![]()
YouTube assembly video :
[youtube]https://www.youtube.com/watch?v=LCDLx8WBojc[/youtube]