So lets start this new build log with the machine base.
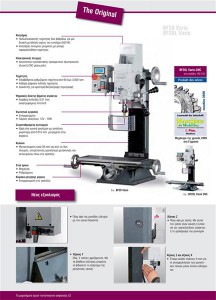
We start of with the conventional Optimum BF20L Vario mill.

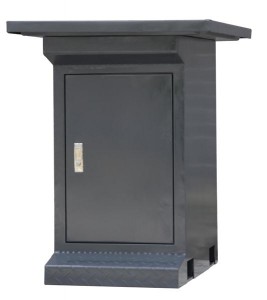
With this machine comes a standard base cabinet and chip collection plate.
But looking at this chiptray we can see that the workshop will become a mess when using this.

RoboCNC Optimum BF20L (Custom) Optimum BF20 Cabinet

Sadly i do not have any machinery to make a metal chiptray, so lets see…
Oke lets go with a waterproof MDF, you know the green MDF used in bathrooms etc.

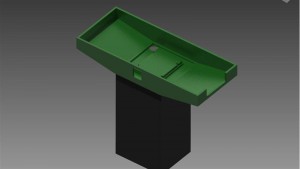
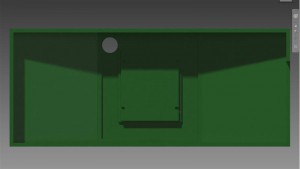
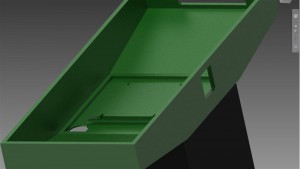
This is the design we came up with for the chip / coolant tray.

Render_01 (Custom) Render_02 (Custom) Render_03 (Custom)

After cutting up the MDF its put together with nails and construction glue.
And afterwords its painted in a 2K Acrylic paint lets hope this will hold up against the coolant.
(Paint used : 2K WU Topcoat WB RAL7011 sold by Goedhuys paints)

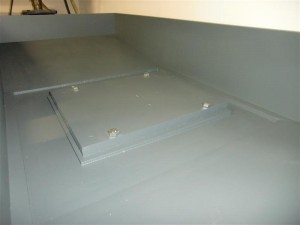
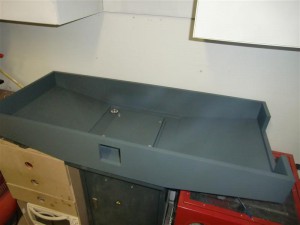
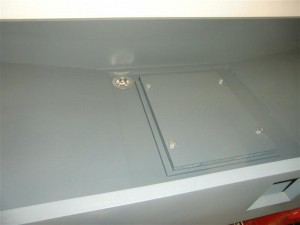
Looking closer to these images you can see that in the left back corner there is a drain for the coolant.
All the parts are made so that all fluid should go to that corner.

RCNC BF20L Chiptray (1) RCNC BF20L Chiptray (2) RCNC BF20L Chiptray (3)

For those of you who are converting a BF20L or a similar machine like the Grizzly G0704
I will try to make all parts, plans and drawings available.
When using them it would be nice to link back, or mention us in return..

— Coolant-Chip-tray drawings —

 — Bottom_Panel STL file if you are not able to slope the slots. —

25 Comments

  1. Jacques Productions Says Beantwoorden

    Good work!

  2. RoboCNC Frees- & Graveerwerk Says Beantwoorden

    Thanks Jacques ! Its a start of a big project… And eventually a lot of new product possibility’s.

  3. RoboCNC Frees- & Graveerwerk Says Beantwoorden

    Thanks Jacques ! Its a start of a big project… And eventually a lot of new product possibility’s.

  4. RoboCNC Frees- & Graveerwerk Says Beantwoorden

    Thanks Jacques ! Its a start of a big project… And eventually a lot of new product possibility’s.

  5. Jacques Productions Says Beantwoorden

    figured…i dont know what it is yet ..but dont tell me allready 🙂

  6. RoboCNC Frees- & Graveerwerk Says Beantwoorden

    Haha… lol… I’ll keep it a secret for you… Otherwise you’ll start to think how this machine can provide your needs 🙂 I cant keep up..

  7. RoboCNC Frees- & Graveerwerk Says Beantwoorden

    Haha… lol… I’ll keep it a secret for you… Otherwise you’ll start to think how this machine can provide your needs 🙂 I cant keep up..

  8. RoboCNC Frees- & Graveerwerk Says Beantwoorden

    Haha… lol… I’ll keep it a secret for you… Otherwise you’ll start to think how this machine can provide your needs 🙂 I cant keep up..

  9. LoomisRex Says Beantwoorden

    Very nice build 🙂 Would love to have a mill also..

  10. RoboCNC Frees- & Graveerwerk Says Beantwoorden

    Thanks Oddmar ! For me it has been a long wish to… so in time my friend… This will come in handy for future CNC Router builds…

  11. RoboCNC Frees- & Graveerwerk Says Beantwoorden

    Thanks Oddmar ! For me it has been a long wish to… so in time my friend… This will come in handy for future CNC Router builds…

  12. RoboCNC Frees- & Graveerwerk Says Beantwoorden

    Thanks Oddmar ! For me it has been a long wish to… so in time my friend… This will come in handy for future CNC Router builds…

  13. DrFiero Says Beantwoorden

    Awesome tray! I’m in the process of converting my BF20L (sold under a different name here in Canada – but the same unit). Can’t wait to see how your progresses, so I can “steal” some of your ideas. 😉

  14. RoboCNC Frees- & Graveerwerk Says Beantwoorden

    Hi DrFiero, Thanks for the nice comment my friend. Just stay tuned, i will post all drawings and info with time.. All 3 axis are already design in CAD, so they will follow in this video series. No stealing need to be done, i’ll provide everything online on my website.

  15. RoboCNC Frees- & Graveerwerk Says Beantwoorden

    Hi DrFiero, Thanks for the nice comment my friend. Just stay tuned, i will post all drawings and info with time.. All 3 axis are already design in CAD, so they will follow in this video series. No stealing need to be done, i’ll provide everything online on my website.

  16. RoboCNC Frees- & Graveerwerk Says Beantwoorden

    Hi DrFiero, Thanks for the nice comment my friend. Just stay tuned, i will post all drawings and info with time.. All 3 axis are already design in CAD, so they will follow in this video series. No stealing need to be done, i’ll provide everything online on my website.

  17. Ben Rogerson Says Beantwoorden

    Thanks for the great info….I used your idea and made a similar one for my Taig mill…thanks again

  18. RoboCNC Frees- & Graveerwerk Says Beantwoorden

    Wow Ben, you are quick 🙂 Nice to hear somebody could use the information !. If only 1 uses the info i post my mission is done..

  19. RoboCNC Frees- & Graveerwerk Says Beantwoorden

    Wow Ben, you are quick 🙂 Nice to hear somebody could use the information !. If only 1 uses the info i post my mission is done..

  20. RoboCNC Frees- & Graveerwerk Says Beantwoorden

    Wow Ben, you are quick 🙂 Nice to hear somebody could use the information !. If only 1 uses the info i post my mission is done..

  21. spoocke Says Beantwoorden

    hey
    bedankt voor het share van dit design.
    enkel een paar kleine aan pasingen en men kleine X2 dc mini mill gaat een gelukige cnc freesje worden.
    met zen eigen huisje.
    knap staaltje werk dat je der uit voert op youtube man.
    volgen je video’s al een jaartje nu.
    samen met die van john grimsmo.
    nu ben ik ook in de cnc ban gevallen :p
    groetjes uit belgie fijne dag nog en !!
    keep up the awesome work!

    • Robo Says Beantwoorden

      Hi Spoocke…

      Heel erg bedankt voor het zeer vriendelijke commentaar !
      Leuk dat u alle filmpjes volgt, en nog leuker te horen dat u er ook iets mee kunt.
      Heel veel succes met de CNC hobby.
      Uiteraard zal ik mijn best blijven doen leuke informatie te plaatsen, en fimpjes te maken !

      Groet uit Nederland 🙂

  22. 3space Says Beantwoorden

    Great video, thank you.Do you remove the 4 hex bolts, place the mill on top, feed them back through the mill base, and fasten underneath? (My SX-3 base has a slightly different mounting mechanism, but I could retrofit your design to it quite easily I’m guessing.)

  23. jeff Says Beantwoorden

    Thanks for sharing everything! It is really helpful. I don’t have to take apart my machine to make a new ball nut adapter now.

Leave a Reply